
| Management > User Manager |
The User Manager is put under the "Users" tab, and you can access it if you are an Administrator or Manager.

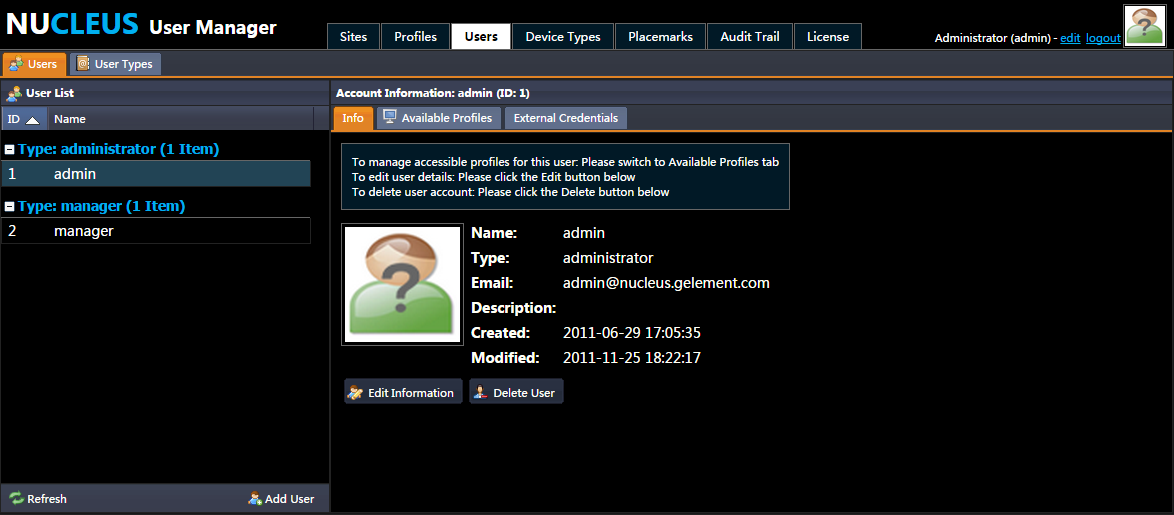
The User Manager displays the grouped users in the 'User List', as shown above. You can click to select a user record in the list to display the user's account information in the right panel where three tabs: "Info", "Available Profiles" and "External Credentials" are placed.
Under the "Info" tab, it shows the basic information regarding the selected user. Meanwhile, you can click the "Edit Information" to update the user's particulars, including the password, type and E-mail etc.; and, you can remove a user by clicking the "Delete User" button.
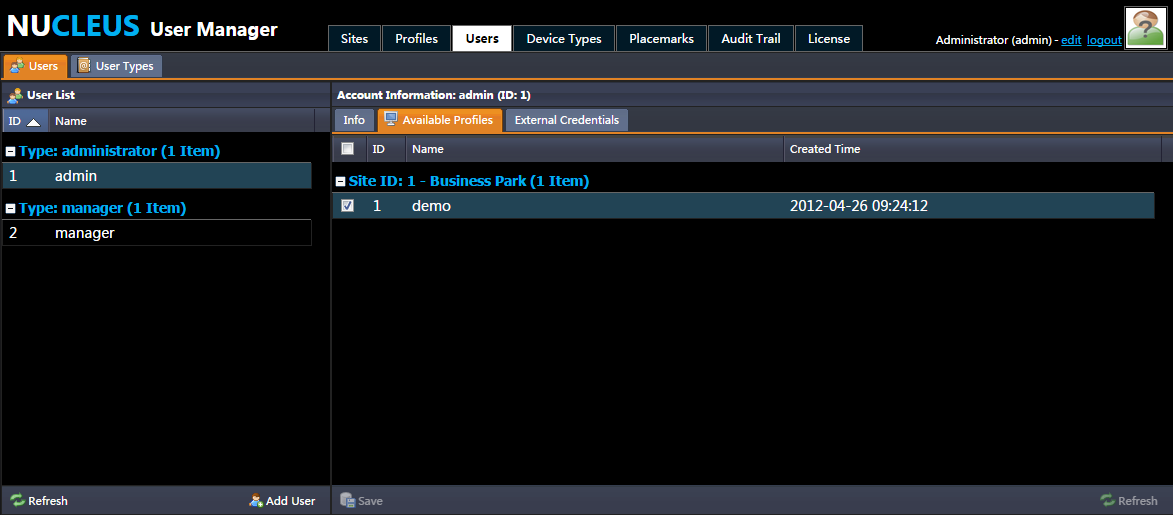
The "Available Profiles" displays which profiles the user can access, as checkboxes. If you want to allow the user to access a profile, you need first check the profile and then click the "Save" button. Similarly, if you want to stop allowing the user to access a profile, you need first uncheck the profile and then click the "Save" button. The illustration below shows that the user 'manager' is allowed to access the 'Demo' profile only.

Regarding the "External Credentials" tab, it need to be used when you intend to deploy the integration with other system such as Milestone XProtect. This will be covered by an XProtect integration user guide.
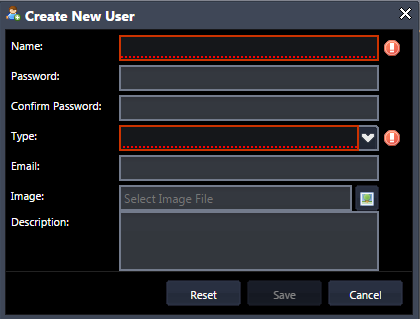
In addition to viewing or editing the existing users, you can also add users. To add a user, click the  button in the left column; then the following window will appear.

In this window, you need to input the particulars for the user:
If you are sure of the input information for creating the user, then you can click the "Save" to finish adding. Alternatively, you can click the "Reset" to clear up your input, or click the "Cancel" to cease the adding.
The Administrator, Manager and Operator have different permissions by default. Although they respectively have different level of privileges, their privileges can be configured. You can reconfigure the Manager and Operator's permissions in "User Types" tab if you are an Administrator, as illustrated below.

Remember to click the "Save" button when you finish the reconfiguration.